The finished product, without mattress(es)
 |
| Closed (single bed) -without mattress(es) |
 |
| Halfway open |
 |
| Fully open (double bed) |
We bought our Rykene bed second-hand.It was
painted grey, had Sultan Lade slats and its headboard had already been sawn off
by the previous owners. So basically we just had wooden sides and legs, slats
and two 70 X 200cm mattresses. Fine for a tiny spare room.
When the Ikea 2012 PS collection came out,
I fell in love with its pull-out bed. The pull-out method is really smooth and
clever and better than that of the Hemnes, but also comprises two slatted
single beds where the slats of one slide into the gaps between the slats of the
other.
I couldn’t justify the cost for the spare
room, and to save every centimetre would have had to remove the curving
headboard – and we already had the two 70cm mattresses.
This is not a serious attempt to copy the
PS 2012 bed (why don’t they name the items in the PS collection?), but more a
thrifty tribute to its great retro looks and clever design.

There are things I would
do better if I were to make this bed again (they are mentioned in red). Learn
from my mistakes and read about the improvements before you cut the wood..
Essentials and optional extras:
You need 2 extra pieces of wood for the head
and end of the pull-out half - each 72cm
long, and 9cm high and about 2,5 cm thick. You want its top to be at the same
height as the top of the original head and end boards when it’s resting on the
original side and middle supports, and on the Sultan support slats.
You’ll need a +/-200cm long slim batten to link the slats
which get pulled out, and stop them from sagging. The screws which attach it to the slats need
to be countersunk, to stop the mattress snagging on them. I bought a hardwood
one with tapered edges.
I bought 2 metal corner brackets to use as
stops –to stop the pull-out half of the bed pulling right out.
You’ll need an electric screwdriver (pretty
standard kit, I think) lots of screws,– shorter ones to attach the slats to the
side supports and long strong ones to screw the sides together. Torx screws are
hugely recommended – specially if, like me, you’re not vastly strong. Take care
not to let them twist your wrist off when they tighten!
I used a radial arm saw and a table saw to
cut the planks and to cut the left-over planking and legs into new legs. I made
extra thick legs for the middle support beam – in
retrospect, rather use the original legs/headboard to make these legs – they’re
thick enough.
I set the radial arm saw set at 10 degrees
to cut slanted legs, and used a bit of oak and black plasterboard screws for
the front of the legs that you see in "front" (which is actually a side) .
You’ll need wood filler for hiding the screw
heads and filling holes needed for the original assembly.
I painted the bed with one little sample
pot of Le Noir & Blanc extra mat in Long Island Grey. Mat is great – it looks
chic, I think, and the lack of
reflection is really forgiving – imperfections disappear.
Get going:

Dismantle everything.
Re-attach the slat supports, but line their
bottoms up with the bottom of the side
planks (so a little lower than they were).
Cut the top and bottom planks to 72 cm.
Pre-drill, glue and screw on (with 3
screws) the now 72cm bottom and top to one of the sides.
So the outside length measurement is 200cm,
the inside length for the static side(the side that stays put when you pull out
the pull-out side) is +/- 195cm, and the inside length for the pull-out side is
+/- 190cm. I thought my 200cm foam mattresses would
squash up to fit in, but it was a squash too far, and they kept popping out and
in the end I cut 10cm off the mattresses. Re-sewing the mattress covers wasn’t
fun, so if your mattresses are 200cm long, I’d recommend cutting the top and
bottom planks 2,5 cm longer (74,5cm) and attaching them to the sides so that
the inner length is 200cm for the static
bed, and +/- 195cm for the pull-out one.
You can see now that the inner width of the
closed [single] bed is 72cm – just a little large for the 70cm mattress. Fully
pulled out, the slats overlap +/-4cm, so the double-bed width is 136cm – each
mattress can easily squash up 2cm in width- in fact the tension keeps the bed
nice and stable.
Now you can also screw/glue the original middle
slat support beam to the static bed top and bottom planks so that it sits right
next to the slat support batten of the pull-out half when the bed’s in this
fully-closed position. The top of this middle support beam should be level with
the top of the side slat support battens. I found that this meant that its lower
edge was fractionally lower than the lower edge of the top and bottom planks.
Re-attach the original middle foot to the middle
slat support. This leg determines the height of all the new legs.
Attach 2 new extra legs to the middle slat
support about 10cm from each end. Screw/glue from the top, through support slat.
Attach the new side legs made from the old
legs by gluing and screwing through the top of the slat support battens, lining
the legs up flush with the sides.
I did the side legs (the
ones you don’t see) differently – I made then from left over sides and attached
them to the insides of the side, to save even more space in the room – this way
the legs don’t butt up against the skirting boards. I wouldn’t do this again –
the differences in thickness of the legs on my bed look a bit silly. If you
have the Rykene headboard, you’ll have plenty of potential leg wood.
With everything still temporarily screwed
together lay down the slats (removing the ribbon and staples was a tedious part
of this otherwise fun job – perhaps it’s not utterly necessary to remove them,
but it is neater). Depending on the length of your bed(s), you may have to play
with the spacing or cut the last slat narrower. Don’t fit them snugly. I
did and had to re-do them. Use something –those plastic criss-cross tile spacers
or cocktail toothpicks – something you
have lots of and which give appropriate spacing, and put them between the slats
at BOTH ENDS. Cocktail toothpicks are the minimum spacing. Otherwise you’ll be
cursing and struggling when you pull the beds apart. Those Sultan Lade slats
are not perfectly regular, so you have to make allowances. Screw the slats down
with one screw each, into the appropriate side support batten (alternating left
and right).

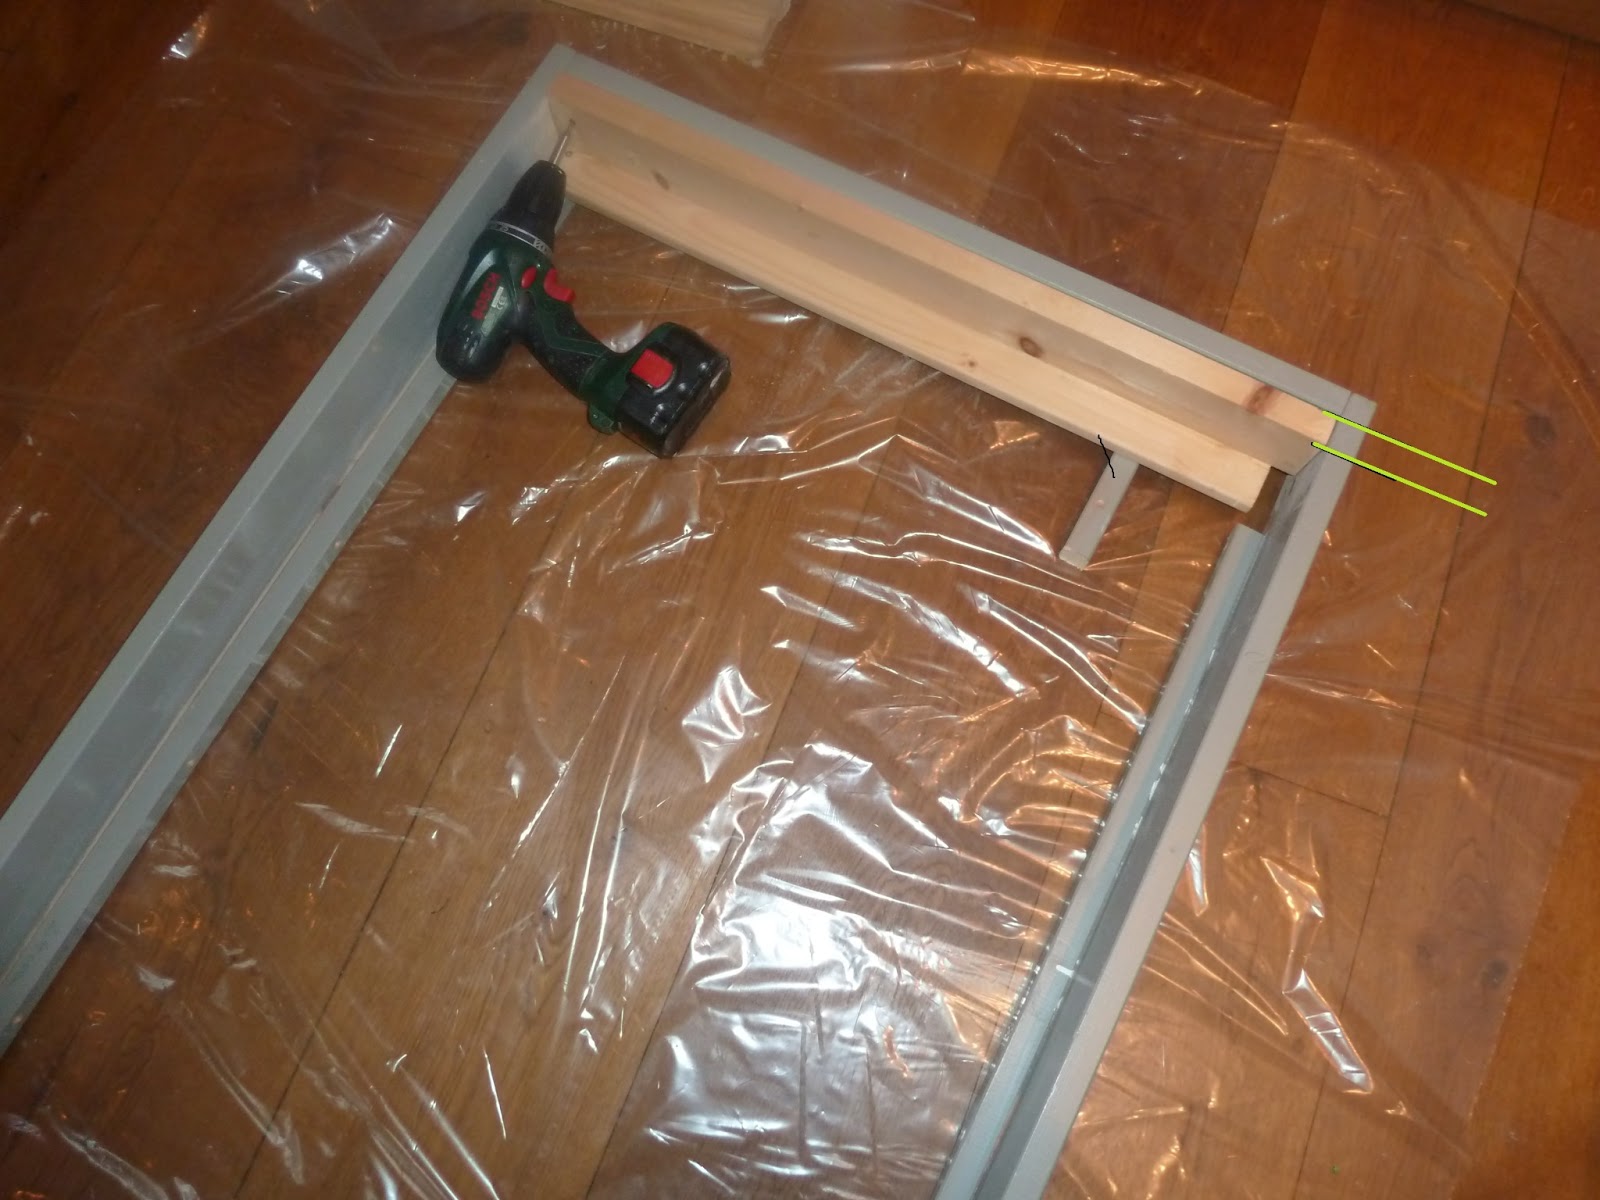
Place the slim long tapered edge batten
along the edge of the slats on the pull-out side. Mark the middle of each pull-out slat on the
batten, Pre-drill holes for the screws and use a countersink attachment make
space for the screw heads.
To stop the pull-out half of the bed
pulling right out, attach the metal corner brackets to the insides of the pull-out
bottom and top. Saw a space, the width of the metal, in the middle support. The metal slips into this cut in the middle support
beam, and then cannot pull any further. You may have to cut a little space in the
slat support batten of the static bed too, so that the metal bracket doesn’t
stop the beds from sliding fully together.
 |
| Fully pulled out, showing the overlap of the slats and the top edges |
 |
| in the closed position, showing top of wall-side leg |
If you are buying the
extra head & bottom planks, you might consider approximating the neater
system the PS bed uses: buy two thinner planks, cutting one in half lengthways,
so that when you attach them together you leave a long groove in the middle of
the outer side. You can then put a peg (use the wooden plugs) into each inner
side of the original head / bottom planks, which slides in the groove and the beds
slide out. Block the groove at the correct (fully pulled out) position. This
will stop the pull-out half of the bed pulling right out, and stop it from
lifting.
Fill up the screw heads and any old holes
with wood filler.

Sand and paint the bits that show. (Remember matt paint
forgives.) I left the middle leg of the middle support beam unpainted, so that
it doesn’t stand out. Screw on your
choice of decorative leg front.

We tested this bed in its double-bed state before
releasing it onto guests. By testing I mean we slept in it… All was well – it is
no more or less solid or comfortable than the original Rykene bed. I do think with both mattresses on the single
bed it’s much too soft and bouncy to sleep on, but that depends on your mattresses
and preferences. It looks neat and works well in our tiny spare rooms.
 |
| pulling out... |
Hope you enjoy making it, too. Do ask if confused.

Dude. This is very close to genius!
ReplyDeleteNice Man...good thinking.
ReplyDeleteAppreciate you sharing your great idea.
I love it
ReplyDeleteDo you think that it would work with a 180x200 bed as well?
ReplyDeleteim make this .. brilliant idea!
ReplyDeleteSo, I have this bed. I am currently using the trundle pull out for the 2nd mattress to make the bed larger to fit my full sized mattress. Is there a way to make your idea work where the slats no longer slide out but are large enough to make it work for a full sized bed? I was also thinking of making one of the side board pieces into the foot of the bed? Any ideas?
ReplyDeleteI am remodeling a small travel trailer. The idea for a pull out bed is fantastic! To begin with I didn't have much room to slide a regular couch into the space due to the furnice and water heater being in the way. This design gave me the idea to buy a futon and customise it to fit the space. Now I have the best of both worlds a built in futon and a slide out bed. Thank you so much..
ReplyDeleteDillan
Slotyro - Casino, Racetrack & Hotel
ReplyDeleteThe Slotyro casino is situated in the heart 강원도 출장샵 of Las Vegas and 김해 출장마사지 is adjacent to 영주 출장샵 Fremont Street Experience. The casino's 2,300 밀양 출장샵 sq ft casino features 안성 출장마사지 2,350 slot
Your writing style is amazing.
ReplyDeleteMattress Mick
vv
ReplyDeleteEfficient
ReplyDeleteA pull out bed is such a space-saving lifesaver—perfect for guests or small rooms without compromising on comfort!
ReplyDelete